How To Fit Nail Tip Extensions
Nail tip hair extensions are a valuable method to be trained in, as some clients are the only method suitable. If you have a client with extremely fine hair, that will not hold onto a micro ring or nano ring hair extensions or a client who continues to lose their hair extensions at a rapid rate, nail tip hair extensions are a good option.

As one of the oldest forms of hair extensions, they aren't as common as they once were, however, they are still a popular method, especially amongst clients who have been having hair extensions for a very long time.
Fitting nail tip hair extension has a lot of similarities with methods such as micro ring hair extensions and nano ring hair extensions in regards to their placement, however there are a couple of differences that are important in ensuring that they are fitted correctly.
Step 1: When fitting nail tip hair extensions, it is essential to prep that hair extensions ahead of time. Nail tip hair extensions come as a preset size in terms of the glue tip, however, they are not designed to be fit like this. They need to be adjusted according to your clients' hair thickness, and therefore for most clients, you will need to remove around half of the tip. By doing this, you will create a much neater and smaller bond.
Step 2: As with all other individual bond methods, you will need to begin by sectioning the hair and slicing your first clean row around 1 inch from the hairline.


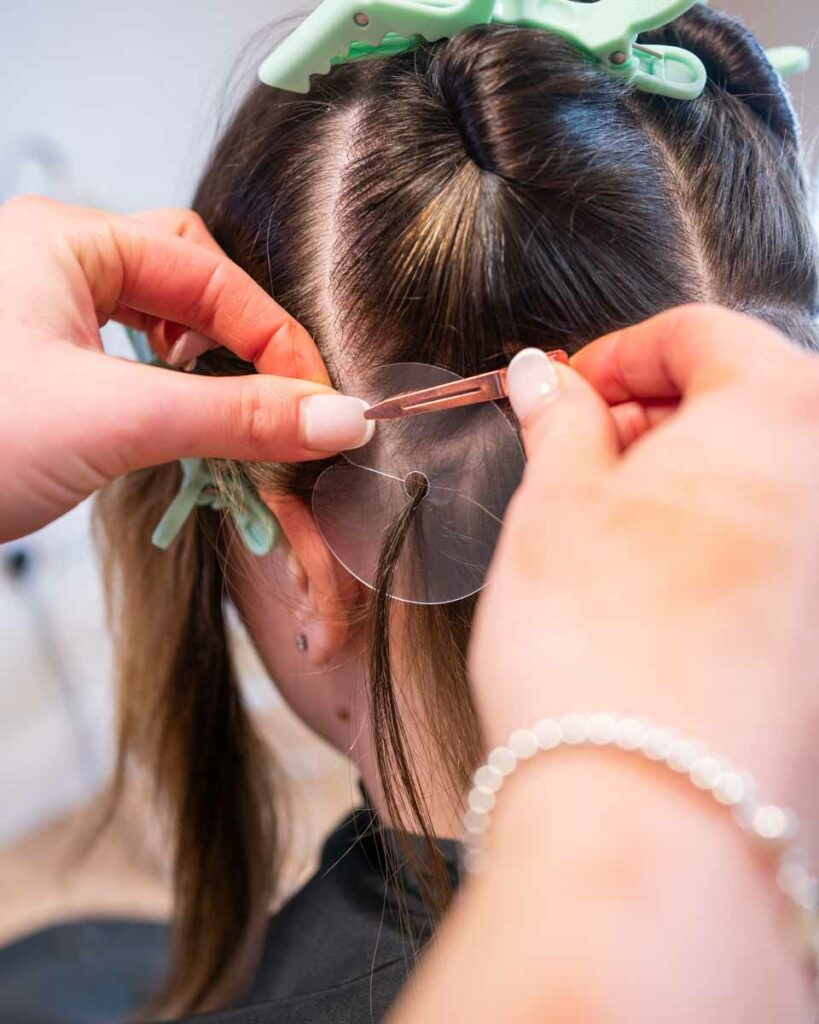
Step 3: An essential step in nail tip hair extension application is to ensure that the hair around the bond is protected when applying heat and any melted glue. Therefore you will need to use a hair shield to protect this area.
Step 4: Take your pre-trimmed nail tip hair extensions, and place it at the back of the first section, ensuring the hair is angled downwards so that the bond lays flat.
Step 5: Use your heated tool to melt the nail tip fully, and then roll the glue between your fingers to create a solid/firm bond.
Step 6: Repeat this process throughout the head, in the same pattern as your standard micro ring or nano ring placement. Always leave enough hair from the head's perimeter to conceal the hair extensions when the hair is tied back.
It is important to remind clients wearing nail tip hair extensions that using the correct aftercare products is essential; however, it is critical with nail tip hair extensions. If the adhesive begins to break down due to incorrect products, the hair extensions could start to shed. It is also imperative to ensure the hair extensions are not left to air dry. This is because leaving the glue damp can cause it to weaken, so drying your hair extensions on a cool setting after washing your hair is essential.


